

Quick Summary
Fabric stiffness is how much a piece of cloth resists bending. You can test it at home with a cantilever method: slide a strip of fabric off a table edge until its tip touches a 41.5-degree angle guide, then measure the overhang. Repeat three times per sample and compare the averages.
- Cut every sample strip to the same size, at least 1 inch wide and 8 inches long.
- Slide the strip slowly until its tip just touches the 41.5-degree angle guide, then stop.
- Measure the overhang in inches and repeat three trials per sample, averaging the results.
- Test both lengthwise and crosswise grain, since many woven fabrics bend differently in each direction.
- A home test ranks samples against each other and cannot replace a certified lab result.
Table of Contents
- What Fabric Stiffness Means and Why It Matters
- Materials You Need for a Home Fabric Stiffness Test
- How to Measure Fabric Stiffness Using a Cantilever Test
- How to Measure Fabric Stiffness Consistently Across Samples
- Using a Fabric Drape Test at Home to Compare Results
- Common Home Test Errors and How to Avoid Them
- Choosing the Right Fabric for Your Next Project
- Frequently Asked Questions
What Fabric Stiffness Means and Why It Matters
Last Updated: October 29, 2026
Fabric stiffness is how much a piece of cloth resists bending.
Fabric stiffness is the resistance a textile shows when you try to bend it.
- Apparel: Stiffness affects collars, structured jackets, and skirts.
- Décor: Stiffness decides whether backdrops hang straight or wave.
- Costume and craft: Stiffness controls how shapes hold between wearings and uses.
Separate stiffness from related ideas. Stretch is how far a fabric extends. Thickness is how tall it is from face to back.
Professional labs use calibrated equipment, but a simple home test can rank your samples and show which behaves more like what you want.
Materials You Need for a Home Fabric Stiffness Test
You need very little to run this test. Most of it is already in a sewing room or kitchen drawer.
- A ruler or measuring tape marked in inches
- A flat table edge with a clean, smooth surface
- A pencil or fabric marker
- Scissors or a rotary cutter
For heavier fabrics like the 10 oz Cotton Duck Canvas, cut strips at least 1 inch wide and 8 inches long. Lighter fabrics need the same length but may work better at 1.5 inches wide so they do not curl. Keep every strip the same size across all samples; unequal strips make fair comparisons impossible.

For a heavy, structured baseline, many buyers start with the 10 Oz Cotton Duck Canvas 58" Wide as a reference. Its listed weight of 315 GSM and 0.75 mm thickness give you a sense of what a firm, heavy fabric feels like before you start measuring.
How to Measure Fabric Stiffness Using a Cantilever Test
The cantilever test is the most practical home method. You let a strip of fabric hang over the edge of a table and measure how far it bends under its own weight: a stiffer fabric extends farther before it droops.
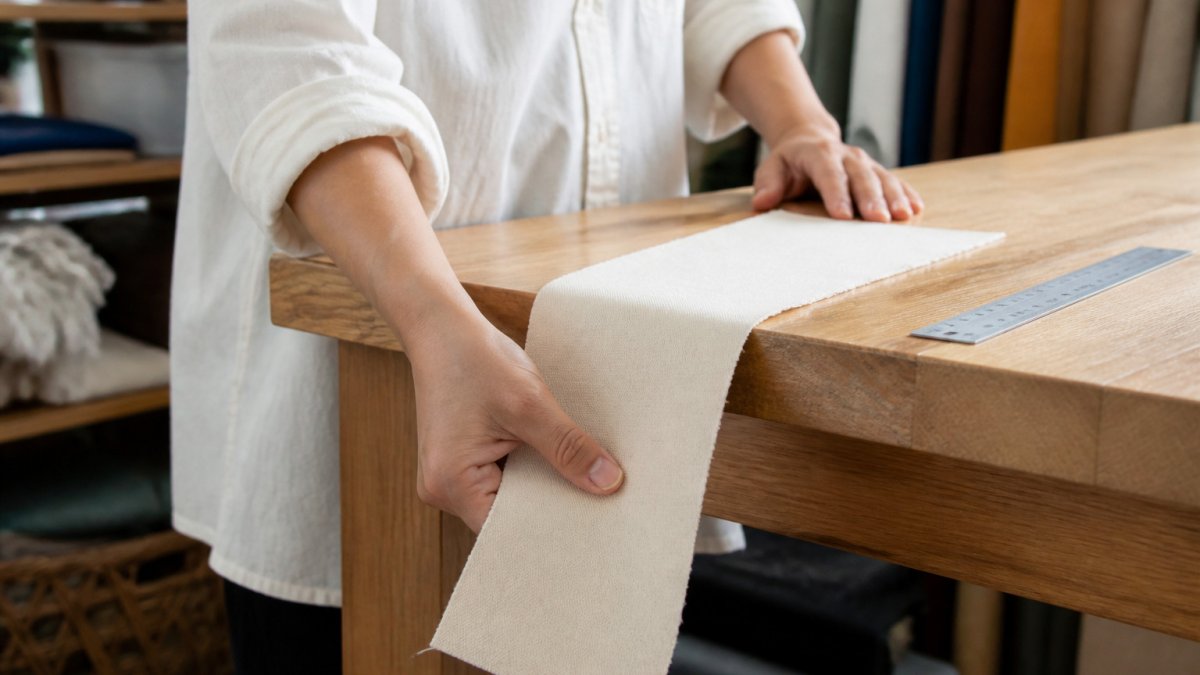
!Hands in a bright home workspace gently sliding a strip of cotton canvas off the edge of a wooden table, a ruler resting beside it
Setting Up Your Test Platform
You do not need a stiffness tester. You need a flat edge and a way to read the angle. Here is a setup that works on any sturdy table:
- Choose a flat, level surface. A dining table or countertop works. Check it with a small level or a glass of water; a rocking surface will skew the reading.
- Mark the table edge. Run masking tape along the edge as a straight reference line. The fabric should slide over this line, not wander off it.
- Build a simple angle guide. Tape a protractor to the table so its flat edge sits along the table edge and its angle mark points down and away. Without a protractor, print a wedge at your chosen angle, cut it out, and tape it in the same position. A fixed angle gives you a repeatable stopping point at home.
- Set your ruler. Lay a ruler flat on the table, zero end at the edge line, running back along the strip's path so you can read the overhang directly.
Work in a room with still air. A fan, an open window, or a heating vent can move a light fabric and throw off your reading.
Preparing Your Fabric Strip
Cut your sample into a clean rectangle and keep the grain direction consistent. If the fabric has a clear warp and weft, cut every strip along the same direction, or test both directions and record each separately.
Place the strip flat on the table. Smooth out any wrinkles with your hand, but do not stretch it. Stretching changes the result.
Measuring the Overhang and Bending Length
- Slide the strip slowly off the edge, keeping it parallel to the ruler, until the free end starts to bend down.
- Keep sliding until the tip of the strip just touches your 41.5-degree angle guide.
- Stop. Read the length of strip that extends past the table edge on the ruler. This is your overhang.
- Record the overhang in inches for that sample.
Bending length is the overhang value used in formal testing; at home, your overhang measurement is a practical stand-in. Record it in inches for each sample.
Repeat the test three times per sample and average the results. Single readings vary. Three readings give you a more trustworthy number.
How to Measure Fabric Stiffness Consistently Across Samples
Consistency turns a home test into something useful. If you measure one sample on a cold morning and another on a warm afternoon, the comparison means little. The biggest source of error is usually handling, not the fabric, so build repeatability into every step.
Control the Variables
Use the same table, strip size, and sliding speed for every sample, and test all samples in one session when you can. Keep your ruler and angle guide in the same position.
Test both fabric directions. Woven fabrics often bend more easily along one grain than the other. Cut one set of strips along the lengthwise grain and one across the crosswise grain, label them, and record each direction separately.
Build a Simple Scoring Scale
Score your results on a plain-language scale so you can sort samples without pretending to lab precision. Here is one approach that works for most buying decisions:
10 Oz Fine Arts Unprimed Cotton Canvas Natural Color 58/60" Wide| New Creations →
- Under 2 inches of overhang: Very soft and drapey
- 2 to 4 inches: Moderate, suits most garments and linens
- 4 to 6 inches: Firm, good for structured pieces and backdrops
- Over 6 inches: Very stiff, suits canvas and interfacing-heavy work
These ranges are a starting point for explaining results, not an industry standard. Adjust them to the fabrics you actually buy, and compare samples tested in the same session against each other rather than against an absolute number.
Record every reading in a simple table so you can compare samples side by side:
| Sample | Direction | Trial 1 | Trial 2 | Trial 3 | Average Overhang |
|---|---|---|---|---|---|
| Sample A | Lengthwise | 3.2 in | 3.4 in | 3.3 in | 3.3 in |
| Sample A | Crosswise | 2.8 in | 2.9 in | 2.7 in | 2.8 in |
| Sample B | Lengthwise | 5.1 in | 5.0 in | 5.3 in | 5.1 in |
Troubleshoot Readings That Vary
Fair comparisons mean the same conditions for every sample. Repeatability means your numbers stay close when you test again. If your trials vary by more than half an inch, work through these checks:
- Curled edges: Hold the flat portion behind the edge with a light weight, or trim a fresh edge and retest.
- Slippery fabrics: Silky or coated fabrics can slide unevenly. Move the strip in smaller increments and pause between them.
- Stretchy fabrics: Knits and stretch wovens can distort under their own weight. Cut them slightly wider and handle them by the edges only.
- Uneven surface: Recheck the table with a level; a slight tilt shows up as a large variation on light fabrics.
Using a Fabric Drape Test at Home to Compare Results
Stiffness and drape are related, but they are not the same. A drape test shows how a fabric hangs and flows.
The simplest drape test uses gravity. Clamp or pin one corner of a swatch to a hook or door frame and let the rest hang freely.
Keep the swatch size the same for each sample. A 12-inch by 12-inch square works well.
Compare your drape photos with your overhang numbers.
For quick sorting, a few practical checks help:
- Does the fabric stand off the hanger or fall close to it?
- Are the folds tight and sharp or wide and rounded?
- Does the hem hang straight or flare outward?
If you buy from a supplier that lists weight in GSM, such as the Polyester Felt 72" Wide listed at 300 GSM, pair that number with your drape photos.

Common Home Test Errors and How to Avoid Them
Most mistakes come from small handling habits. Here are the ones that cause the most trouble.
- Stretching the strip: Pulling the fabric while placing it adds length and skews the overhang reading. Lay it down gently.
- Uneven strip sizes: A wider strip can bend differently than a narrow one. Cut every sample to the same dimensions.
- Testing on a warped table: A table that is not level changes the angle. Check with a level or use a flat, sturdy surface.
- Rushing the slide: Pushing quickly can pull the strip past the angle line. Move slowly and stop at the mark.
- Skipping repeats: One reading is not enough. Always run three trials.
A common mistake is treating the home test as a final verdict. It shows how samples compare to each other; it does not give a certified stiffness value for a spec sheet or legal claim.
Choosing the Right Fabric for Your Next Project
Once you have your numbers, match them to the job.
For structured pieces such as tote bags, slipcovers, or banners, a higher overhang is usually a good sign. The 10 Oz Fine Arts Unprimed Cotton Canvas lists a tear strength of 1000 N in the warp direction, suiting bags and upholstery.

For softer projects like flowing garments or lined costumes, you want a lower overhang.
If you plan to sew with synthetic or blended fabrics, your needle choice matters as much as stiffness.
For apparel brands sourcing at scale, consistency across rolls is a sensible goal.
The best fabric is the one that does its job in your hands. Test, record, compare, and choose.
Frequently Asked Questions
How can I test fabric stiffness at home without special equipment?
You can run a basic cantilever-style check with a table, a ruler and a strip of fabric. Cut a strip roughly 1 inch wide and 6 inches long, slide it off the edge of a smooth table so it overhangs, and measure how far it extends before the free end dips to a set angle. Record the length, repeat the test three times and average the results. This gives a useful comparison between fabrics, though it is not a standardized measurement under ASTM D1388.
What household tools can I use to compare fabric stiffness?
A flat table with a clean edge, a ruler or tape measure, a small weight such as a binder clip, and a protractor or a printed angle guide are enough for a home test. A phone camera can help you capture the overhang at the same angle each time. Keep the same tools and table for every sample so the results stay fair and repeatable across fabrics.
How can I make a fair stiffness comparison between two fabrics?
Cut both samples to identical dimensions, test them on the same surface, and follow the same overhang angle. Test each fabric in both the warp and weft directions, since woven cloth often bends differently across its grain. Repeat each measurement at least three times and compare the averages rather than single results. Note the fabric weight and fiber content so you can explain differences in your findings.
Does fabric weight affect how stiff it feels?
Heavier fabric usually feels stiffer, but weight alone does not decide it. Fiber type, yarn thickness, weave structure and finishing treatments all change how a fabric bends. A lightweight cotton canvas can feel stiffer than a heavier knit. Use a cantilever test to measure bending directly rather than judging stiffness by weight on the label.
