

Table of Contents
- What Fabric Color Crocking Means and Why It Matters
- What You Need for a Crocking Test
- Step-by-Step: How to Perform a Fabric Color Crocking Test
- AATCC 8 Crocking Test: Key Parameters to Follow
- Wet Crocking Test: Moisture Pickup and Procedure
- Dry Crocking Test: Setup and Common Pitfalls
- Using the Gray Scale for Staining to Rate Results
- Troubleshooting Inconsistent Results and When to Use a Lab
- Frequently Asked Questions
Last Updated: October 14, 2026
What Fabric Color Crocking Means and Why It Matters
Crocking is the transfer of dye from a fabric onto another surface through rubbing, pull on new dark jeans and find blue stains on your hands, and you have seen it.
A crocking test measures how much color rubs off a textile under controlled conditions.
The test uses a crockmeter: a standard white cotton cloth rubs against your fabric specimen under set pressure, and you rate the resulting stain against a gray scale.
What You Need for a Crocking Test
A complete crocking test setup needs four things: a crockmeter, standardized rubbing cloth, a gray scale for staining, and prepared fabric specimens.
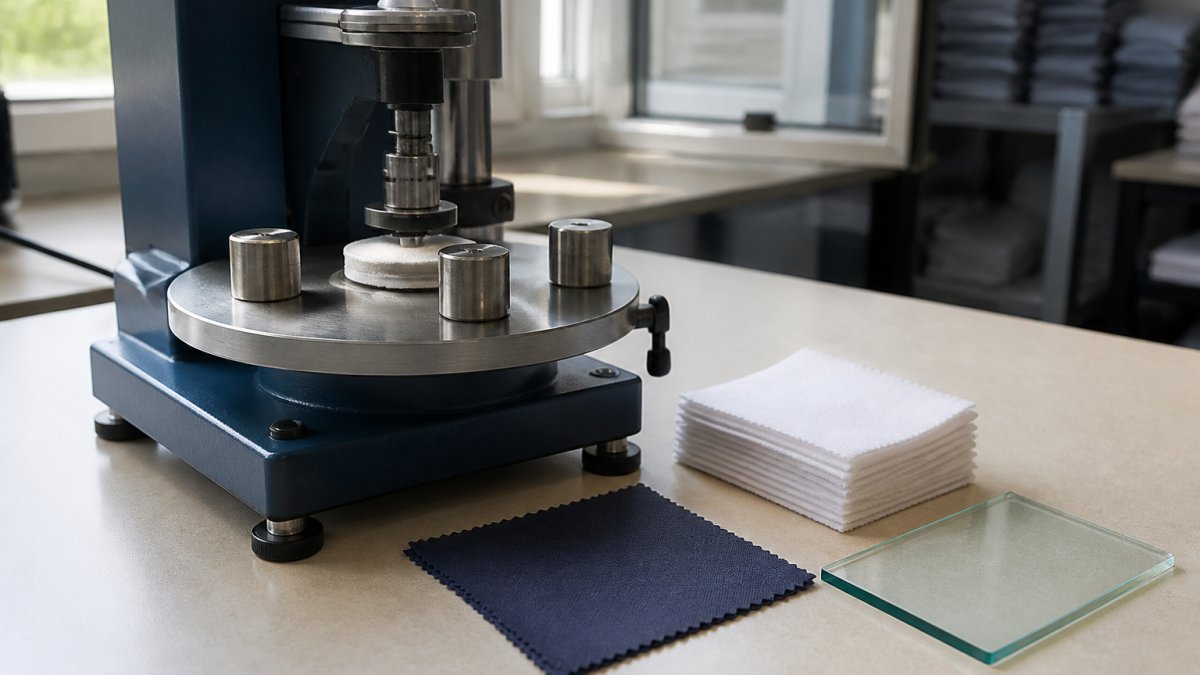
Here is your equipment checklist:
- Crockmeter (manual or motorized rotary vertical crockmeter)
- Rubbing finger with a 16 mm diameter acrylic or rubber tip
- Standard cotton rubbing cloth, cut into test squares
- Gray scale for staining for visual rating
- Glass plate or sample holder for wet tests
- Distilled water and a small beaker for wet pickup
- Conditioned fabric specimen cut to size
The crockmeter base holds the specimen flat while the rubbing finger applies pressure in a straight-line motion.
The rubbing cloth matters as much as the machine. Standard cotton cloth has a defined weave and absorbency; substituting paper towels or scrap fabric will throw off your rating.
Step-by-Step: How to Perform a Fabric Color Crocking Test
The full procedure takes about 30 minutes per specimen once materials are conditioned.
Step 1: Prepare and Condition the Fabric Specimen
Cut two specimen squares, each at least 50 mm by 140 mm, one for dry crocking, one for wet. Condition them at 65 ± 2% relative humidity and 21 ± 1°C for at least 4 hours; conditioning stabilizes moisture content, which affects how much surface dye transfers. Label each specimen with lot number, fabric type, and date, or results become useless when tracing a problem batch.
Step 2: Mount the Specimen and Rubbing Cloth
Clamp the conditioned specimen flat on the crockmeter base so it does not wrinkle or shift. Wrap a fresh white test cloth square over the rubbing finger, taut and unbunched; for a wet crocking test, wet the cloth first. Lower the finger onto the fabric at roughly 9 N of force.
Step 3: Run the Rubbing Cycles and Evaluate Transfer
Run 10 complete rubbing cycles at a steady rate, each cycle one forward and one backward stroke along the same track. Remove the white rubbing cloth and let it dry completely before rating, since wet cloths read darker. Compare the stained cloth to the gray scale for staining under north-facing daylight or a controlled light box, then record the number and note any uneven staining pattern.
AATCC 8 Crocking Test: Key Parameters to Follow
AATCC 8 is the method most domestic apparel brands and retailers reference for colorfastness to rubbing, defining the machine, cloth, pressure, and rating scale in one document.
| Parameter | AATCC 8 | ISO 105-X12 |
|---|---|---|
| Rubbing cycles | 10 | 10 |
| Rubbing finger diameter | 16 mm | 16 mm |
| Specimen size | 50 mm x 140 mm | 50 mm x 140 mm (or 25 mm x 100 mm for small samples) |
| Rubbing cloth | Standard cotton | Standard cotton |
| Vertical force | Approximately 9 N | Approximately 9 N |
| Wet pickup target | 65 ± 5% by weight | 65 ± 5% by weight |
| Rating scale | Gray scale for staining | Gray scale for staining |
| Conditioning | 21 ± 1°C, 65 ± 2% RH | 21 ± 1°C, 65 ± 2% RH |
On paper the numbers look nearly identical, which is why operators assume the methods are interchangeable. AATCC 8 specifies the rub direction relative to the fabric's warp or length direction and how to handle nap or pile so the finger travels with the grain.
The AATCC test method library lists AATCC 8 as the go-to method for crocking on textiles. If you are testing for an overseas buyer, confirm which standard they want before you run anything.
AATCC 8 is written for textiles in general, but many product categories, automotive interiors, upholstery, and certain government contracts, reference their own method or add acceptance criteria. Always read the full specification, not just the method number.
Wet Crocking Test: Moisture Pickup and Procedure
The wet crocking test reveals how a dyed fabric behaves when it gets damp from sweat, rain, or laundering.
The procedure mirrors the dry test with one change: wet the rubbing cloth before mounting it.
Here is the wet pickup process:
- Weigh the dry white cloth on a precision scale
- Soak it in distilled water and blot briefly
- Weigh again and calculate the moisture content
- Target 65 ± 5% pickup by weight
- Mount and run 10 cycles as normal
That 65 ± 5% pickup range is the part most people get wrong.
After testing, air-dry the cloth flat before rating against the gray scale.
Dry Crocking Test: Setup and Common Pitfalls
The dry crocking test is the baseline check: no moisture, just fabric against a dry cloth. It catches surface dye that never bonded properly during finishing.
Setup is identical to the wet test minus the water. But three pitfalls trip up even experienced operators:
- Skipping conditioning. Fabric pulled straight from a humid warehouse will read differently than a conditioned specimen. Always condition first.
- Reusing rubbing cloth. A cloth that already picked up dye will under-report transfer on the next specimen. Use a fresh square every time.
- Testing the wrong side. Many fabrics have a face and a back with different dye penetration. Test the side that actually touches skin or upholstery.
Using the Gray Scale for Staining to Rate Results
The gray scale for staining is a set of reference chips numbered 1 through 5, with half steps in between. Match the stained white cloth to the closest chip to get your color transfer rating.
How to read the scale:
- 5: no visible staining
- 4: slight staining, acceptable for most apparel
- 3: noticeable staining, borderline
- 2: obvious staining, fails most retail standards
- 1: heavy staining, clear failure
Most apparel programs require a minimum of 4 for dry crocking and 3 to 4 for wet crocking. Always confirm the buyer's acceptance criteria before you test, because requirements vary by end use.
Record the numeric rating plus a short note on staining pattern. Uneven staining often points to a finishing problem, not a dye problem.
Troubleshooting Inconsistent Results and When to Use a Lab
Inconsistent results almost always trace back to one of four sources: moisture, pressure, cloth, or specimen prep. Match the symptom to the cause, because a swinging rating and a borderline rating have different fixes.
| Symptom | Likely cause | Fix |
|---|---|---|
| Rating swings a full step or more between identical specimens | Specimen not conditioned, or conditioned for less than 4 hours | Condition at 21 ± 1°C and 65 ± 2% RH for the full 4 hours; verify with a hygrometer |
| Staining is darker on one edge of the cloth | Specimen slipped or wrinkled during the stroke | Re-clamp flat; check that the specimen does not shift when you press the finger down |
| Wet results vary widely between operators | Hand-wrung cloth instead of weighed pickup | Weigh the dry cloth, wet it, weigh again, and target 65 ± 5% by weight |
| Dry results look artificially clean | Rubbing cloth reused from a prior specimen | Use a fresh square for every specimen, every time |
| Staining pattern is blotchy or uneven | Contaminated rubbing cloth, or dye migration from a finishing defect | Inspect the cloth before use; if the pattern persists on fresh cloth, suspect the fabric |
| Rating disagrees between two trained operators | Rating under different lighting | Standardize on north-facing daylight or a controlled light box for every rating |
If results still swing after controlling these variables, the issue may be the fabric itself. Inconsistent dye lots, poor fixation, or uneven finishing produce uneven crocking results no matter how careful you are.
What the Rating Actually Means for Acceptance
The gray scale gives you a number, but it does not tell you pass or fail. That call depends on the product specification, the customer, or the applicable standard.
A borderline result, say, between 3 and 4, is not a verdict. Run a second specimen from the same lot before you accept or reject a batch; one test square is not enough evidence for a shipment decision.
What an In-House Test Can and Cannot Establish
In-house testing is for screening and quality control. It tells you whether a lot is consistent with your baseline and whether a problem is worth escalating.
Three limitations are worth stating plainly:
- Visual grading is subjective. Two trained operators can disagree by half a step even under controlled lighting. The gray scale reduces that variance; it does not eliminate it.
- Your equipment may not be calibrated to the same traceable standard as a lab's. A crockmeter that has never been verified against a reference can drift in pressure or stroke length without anyone noticing.
- Your conditioning environment may not hold the specified tolerances. A room that reads 65% RH in the morning can drift by afternoon, and the specimen will follow.
Send borderline or disputed batches to an accredited laboratory. Third-party labs run the same method with calibrated equipment, documented traceability, and a report your buyer will accept, in-house testing is not a substitute when a shipment is on the line.
Documenting and Reporting Results
Document every test with enough detail that a second person could reproduce it. A reusable checklist covers:
- Method and standard cited (AATCC 8 or ISO 105-X12, with edition year)
- Specimen ID, lot number, fabric type, and which side was tested
- Dry or wet condition, and measured wet pickup percentage
- Equipment ID and any calibration record
- Conditioning time, temperature, and relative humidity
- Number of cycles and stroke rate
- Rating (numeric, with half steps) and a note on staining pattern
When a buyer disputes a batch, that record is your defense. Without it, you have an opinion. With it, you have evidence.
Frequently Asked Questions
What is the difference between wet and dry crocking?
Dry crocking uses a dry white cotton rubbing cloth to check for color transfer from surface dye or pigment. Wet crocking uses a cloth wetted to roughly 65% pickup, which can pull dye from deeper in the fiber. Many fabrics pass dry crocking but fail wet crocking, especially darker shades or reactive dyes. Both tests follow the same rubbing motion but different moisture conditions, so you should always run both when evaluating a fabric.
How do you interpret crocking test results?
You compare the staining on the white rubbing cloth to the gray scale for staining, which runs from Grade 1 (heavy color transfer) to Grade 5 (no transfer). A rating of 4 or higher is generally acceptable for apparel, while 3 or below signals a problem. Record the numerical rating, the test method used (AATCC 8 or ISO 105-X12), and the condition (dry or wet) so the result is repeatable and comparable across batches.
Can you perform a crocking test without a crockmeter?
A crockmeter gives consistent pressure and stroke length, but you can approximate the test at home with a white cotton cloth and a smooth weight. Rub the fabric with firm, even strokes, then compare the cloth to a gray scale. This is only a rough check. For acceptance criteria, buyer approvals, or disputes, use a calibrated crockmeter and follow AATCC 8 or ISO 105-X12 in a controlled environment.
How can fabric color transfer be reduced?
Color transfer often comes from excess surface dye. Washing the fabric before cutting can remove loose dye, and some mills apply a fixative or rinse after dyeing. Choosing fabrics with a higher crocking rating from the start is the most reliable fix. When sourcing, ask the supplier for crocking test data on the specific dye lot, and test a swatch yourself before committing to bulk production.